


Charles Joseph Fletcher
Father of William George Fletcher
Born:
29 Dec 1894 Tambo, Queensland, Australia
Married:
23 Feb 1927 Holy Trinity Church, Bowen, Queensland, Australia to Mildred Edmonds
Died:
7 Aug 1941 Alexandria, Egypt. Age 46
Cause of death:
Died of wounds sustained in battle at Tobruk, Libya
Buried:
8 Aug 1941 British War Cemetery, Alexandria, Egypt. Later moved to Grave No. 3, Plot 2, Row C Alexandria (Hadra) War Memorial Cemetery, Alexandria, Egypt
Timeline
Dec 1894
1903-1909
1910
1910-1914
1916
1916-1919
1921-1922
1923
1925
Feb 1927
Sep 1927
1928-1930
1932-1934
1936-1937
1939
1940-1941
May 1941
Aug 1941
Born on Edward Street, Tambo, Queensland [1]
Lived with grandparents at Ashburton, Queensland [4]
Lived with grandparents at Farleigh and worked as a labourer [8]
Served in Australian Imperial Force 21st Machine Gun Company in France and Belgium. Served as a Driver. Rank of Private [8]
Lived at Bowen. Selling firewood with half-brothers Vivian and Thomas Beasley, under business name of "Messrs. Fletcher Beasley Bros" [11]
Lived at Macknade and worked as a labourer [12]
Married Mildred Edmonds. Lived at Powell St, Bowen, Queensland and worked as a labourer [13]
Lived at Mia Mia via Mirani and worked as a labourer [14]
Lived at McIntyre Street, Mackay and worked as a labourer [21]
Served in Australia Imperial Force 2/12th Infantry Battalion in Egypt and Libya. Served as batman to Lieut. (later Capt.) Harvie. Rank of Private [22] [23, 23a]
Sustained wounds as part of action against German army in Tobruk, Libya. Transported to Alexandria [22]
Died of wounds at General Hospital, Alexandria [24]
Biography
Early years
For a more detailed story of Charlie Fletcher, you can read the book I wrote on his life, The Fletcher Family: Story of our Origins.
Charles Joseph Fletcher ("Charlie") was born Charles Joseph Legg on 29th December 1894 in Tambo. Known as Charlie, from his earliest years he had been raised by his grandmother Lena Ivory and her second husband George Albert Fletcher. Charlie called Lena "mum" [1] [25].
Charlie's birth mother was Lena's daughter, Elizabeth. By 1898, she was married to Charles Thomas Beasley [26]. At the time of their marriage, Beasley had no desire for Charlie to be around and Lena was adamant that Charlie stay with her, so Charlie remained with his grandparents [25].
Charlie and his grandparents moved to the Toliness grazing farm where George worked as a labourer from at least 1903 [2]. Afterwards, the family settled onto a farm in Farleigh, QLD, specifically the Coningsby area, from around 1910, when Charlies was 16 years old [5] [6]. Farleigh and Coningsby were old sugar plantations that had been subdivided into smaller cane farms to be worked by small-scale farmers, so the farm they had would have been a sugar cane farm.
Charlie integrated into the local community and was a member of the Farleigh Social Club [5].

Farleigh, early 1900s
World War I service
After the declaration of war by Great Britain (and subsequently Australia) in 1914, recruitment for soldiers began in Australia. We know that Charlie attended a recruitment drive at Mackay on the evening of 22nd January 1916 [27]. On 20th March 1916, Charlie enlisted at the Central Recruiting Depot in Rockhampton, aged 21 years. Upon enlistment, he was recorded as being 5 ft 7 ¾ in tall, 58 kg (9 st 2lb), with dark complexion, dark brown hair and hazel eyes [8].
The Farleigh Social Club gave him and another Farleigh recruit a send-off on 22nd March and Charlie was given an inscribed silver fountain pen. Charlie's demeanour at the send-off was described as “manifestly shy before an audience which included many pretty girls” [5].
Charlie completed his initial training at Enoggera Barracks in Brisbane before being sent to the Machine Gun Depot at Seymour, Victoria, for specialist training. He embarked for England aboard HMAT Commonwealth on 19 September 1916 as part of the 5th Reinforcements for the 12th Machine Gun Company. During the voyage he was twice admitted to the ship’s hospital with trouble in his knee, including synovitis, an inflammation of the joint [8].
After arriving at Plymouth on 14 November, Charlie continued his training at the Australian Machine Gun Training Depot at Grantham. In January 1917 he was taken on strength of the newly formed 21st Australian Machine Gun Company and, the following month, was mustered as a Driver [8].
Charlie’s role as a Driver did not normally mean that he was one of the men firing the Vickers machine guns. During the First World War, motor transport was still limited and machine-gun companies relied heavily on horses and mules to move their weapons, ammunition and equipment. A Vickers gun was heavy, and once its tripod, water, spare parts and the enormous quantities of ammunition it required were added, transporting a machine-gun section was a substantial undertaking.
The company therefore used horse-drawn limbers — two-wheeled vehicles designed to carry guns, ammunition and equipment — as well as pack mules where wheeled transport could not reach. As a Driver, Charlie helped care for and harness the animals, drive the limbers, and move guns, ammunition and other supplies between the transport lines and forward positions.
During battle, drivers would take the guns and ammunition as far forward on limbers as the terrain and enemy fire allowed. From there, supplies might continue by pack mule or be carried by men to the gun positions. This could be dangerous work: the roads and tracks behind the front were frequently shelled or subjected to gas attacks, and the 21st's later war diary repeatedly records ammunition being carried forward while its guns were in action.
The diary shows this system in practice, recording fighting limbers being kept harnessed and ready, pack mules carrying ammunition forward, and tens of thousands of rounds being supplied to gun batteries during major battles.
On 17 March 1917 Charlie left Grantham with the 21st Machine Gun Company and travelled overnight to Southampton. The men crossed the Channel aboard SS Donegal, landed at Le Havre in France the following morning and, after several days in camp, travelled by train to Albert before marching to billets at Dernancourt.
Within weeks Charlie was experiencing active warfare. On 15 April the Germans launched a major counterattack around Lagnicourt. The 21st Machine Gun Company had guns positioned throughout the Australian defensive system and several were caught when German troops broke through the front line. Three of the company’s guns were captured, together with an officer and eighteen soldiers, before Australian counterattacks recovered the lost ground. Charlie’s records do not identify his individual position during the battle but he was serving with the company throughout the action [8] [28].
In May the company moved into the fighting around Noreuil and Bullecourt during the Second Battle of Bullecourt. Between 9 and 20 May its gun positions were subjected to repeated heavy artillery bombardment and extensive gas shelling. On 15 May the Germans opened an intense drumfire artillery barrage before launching a counterattack at 4.30am, which was repulsed by rifle, bomb, machine-gun and artillery fire [29].
When the company was finally withdrawn, its horses and mules were noted as much improved by the abundance of green feed. The men marched back through Bazentin and Dernancourt, where they were able to bathe and clean and maintain their limbers. For the next several months Charlie’s service was comparatively quieter, consisting largely of training, inspections, transport work and route marches as the company recovered and prepared for further operations [29].

22nd Machine Gun Battalion resting along sunken road in preparation for 2nd Battle of Bullecourt, 1917
By September 1917, Charlie’s company had moved north into Belgium to join the fighting around Ypres. The British and Commonwealth armies were several months into the Third Battle of Ypres, a major offensive intended to push the German army back from the high ground east of the city. Earlier attacks had become bogged down in rain, mud and fierce German resistance, but the next phase would use a more limited approach: capture a relatively shallow stretch of ground, consolidate it, and use artillery and machine-gun fire to break up the inevitable counterattacks before moving forward again.
The next attack was planned for 20 September at Menin Road. In the days beforehand, the 21st Machine Gun Company moved men, guns and enormous quantities of ammunition forward into prepared positions from which its Vickers guns could support the infantry advance. On the evening of 19 September the company began moving into the line through congested roads, wet ground and almost complete darkness. Shelling had already damaged many of the prepared gun positions, and telephone cables laid to the machine-gun batteries — groups of Vickers guns organised to fire together — were repeatedly disrupted. It took until about 4am to get the sections into position [30].
Zero Hour — the predetermined moment at which the attack was to begin — was set for 5.40am. At that instant the artillery barrage opened and the Australian infantry began its advance. The 21st's machine guns supported them with planned barrage fire and, as captured ground was consolidated, switched to pre-arranged S.O.S. lines. These were defensive firing lines plotted in advance: if German troops began a counterattack, the front line could send up an S.O.S. signal, usually a flare, and the machine guns would immediately open fire on the designated area to try to break up the attack before it reached the newly won positions [30].
The fighting continued throughout the day and into the following night. The company suffered heavily: five men were killed, at least nineteen wounded and several guns and tripods put out of action. On 21 September alone, the 21st's guns fired around 60,000 rounds [30].
There was little opportunity to recover. Only days later, on 26 September, the company was back in action during the Battle of Polygon Wood, again firing in support of the Australian advance and then helping to break up German counterattacks. Between 25 and 28 September the 21st's guns expended approximately 162,000 rounds. Keeping them supplied required a constant flow of ammunition forward through ground that was being shelled with both high explosive and gas. The diary records pack mules carrying ammunition to the gun positions and, during one S.O.S. call, men having to carry fresh ammunition up to every gun while the fighting was still underway. For Charlie, his experience of the battle was as much along the supply routes behind the guns as at the gun positions themselves. During the Polygon Wood fighting, the diary records ammunition being carried up to every gun while an S.O.S. barrage was still in progress. Charlie would have been working within that constant flow of men, animals, limbers and ammunition, hauling supplies along roads and tracks under shellfire and gas attack so that the guns could keep firing [30].
By the time the 21st was pulled out on 28 September, the effects of the previous days were impossible to miss. The war diary noted simply that “the majority were shaken”, and that several men were suffering from the effects of gas. Before they could properly rest, those who had not already done so were told to make out their wills. Then came the ordinary business of recovery: the men were sent for baths, cleaned up and prepared to carry on [30].
There was little time to recover. The success at Menin Road and Polygon Wood had encouraged the British command to continue the same method of limited advances east of Ypres: take a relatively shallow objective, consolidate it, and use artillery and machine-gun fire to smash the German counterattacks that followed. The next step was the Battle of Broodseinde on 4 October 1917, an attempt to seize more of the high ground along the ridge towards Passchendaele. For Charlie and the 21st, that meant preparing for yet another enormous machine-gun barrage only days after coming out of the previous fighting.
Before dawn on 4 October, six of the company’s Vickers guns were in position south of Albania Wood. At Zero Hour, the guns started a carefully timed creeping barrage, lifting their fire gradually ahead of the advancing infantry. They kept it up for almost five hours, firing around 212,000 rounds, before the guns were cleaned, reset and moved to new positions. Later that day, and over the days that followed, they were called on again to fire defensive S.O.S. barrages as German troops tried to counterattack [31].
After Broodseinde, the company was finally withdrawn from the line on 8 October to Café Belge and, on 13 October, they moved to the Red Horse Shoe Camp for a short period of rest, equipment repair and reorganisation. On 14 October 1917, Charlie was appointed Lance Corporal. The service record gives no reason for the appointment, but it came after months of front-line service and only days after the intense fighting at Menin Road, Polygon Wood and Broodseinde [8] [31].
The company remained at the Camp but preparations were already underway to return to the forward area as the battle around Passchendaele continued [31].
By 22 October, the 21st Machine Gun Company returned to the forward area around Zonnebeke and the Ypres–Roulers railway during the final stages of the Passchendaele campaign. Enemy artillery and gas shelling were frequent. On 29 October alone, 26,000 rounds of small-arms ammunition were carried forward to the company’s two batteries. Two officers were killed when a shell struck their dugout, and on 31 October another shell burst in the entrance to Company Headquarters, seriously wounding the commanding officer [31].
During the night of 1 November gas shelling was so extensive that the men had to wear their Small Box Respirators for much of the night. When the company was relieved the following day, two men were subsequently evacuated suffering from the effects of gas [32].
The 21st was finally relieved from the front line on 2 November. After several days in the rear, the whole 1st Australian Division - including the 21st - began withdrawing from the Ypres sector on 8 November, and Charlie’s company marched out the following day [32].
After the withdrawal from Ypres, the 21st spent several weeks resting and retraining in France. Life settled back into a rigid routine, with parades at 9am and 2pm most days. Some were general inspections, but many were directly connected with the company’s transport work: washing and cleaning limbers, practising how to pack and unpack them, checking their mechanisms and stoppages, and drilling in the handling and filling of ammunition belts. For Charlie, the parades reflected the everyday side of being a driver — caring for the transport, keeping the limbers serviceable and making sure that, when the company was ordered back into action, its guns and ammunition could move with it [32].
In December the company returned to Belgium. By then the major offensives around Ypres had largely run their course and both sides were settling into a more static winter phase, holding and strengthening the positions won during the autumn. The pace of fighting was quieter than it had been during the Ypres battles, but the front was by no means peaceful. Charlie’s company was again in the line, and throughout December 1917 and January 1918 they carried out routine defensive duties, such as firing at enemy positions they could not see directly by using calculated ranges and map references, and keeping guns ready for anti-aircraft work when required [33].
On 30 January 1918, the 21st were finally relieved and pulled back to billets at Locrehof Farm, near the village of Locre (modern-day Loker) in West Flanders, Belgium [46].
On 3 February 1918, while the company was at Locrehof Farm, Charlie wrote an embroidered postcard to his half-sister Dorothy Beasley (known as Dorrie):
“we are having some good wether here now it is not to cold and it as knocked off raining for a wile… I see in the paper the other day where Mackay is all under water…”
Despite everything Charlie had experienced during the preceding year, his surviving letter makes almost no reference to the war itself. Instead he wrote about the weather, flooding at home and family news, before assuring Dorrie that he was well and signing off with love.
Only two days later, on 5 February, Charlie was admitted sick with synovitis of his left knee. He passed through a series of field medical units before being admitted to No. 24 General Hospital at Étaples with P.U.O. — pyrexia of unknown origin, or unexplained fever. This diagnosis was often associated with illnesses such as trench fever during the First World War [8].
Charlie remained away from his unit for nearly three months. During his absence, the 21st Machine Gun Company became part of the newly formed 1st Australian Machine Gun Battalion [8].
He finally rejoined the battalion in the field on 26 April 1918, during the closing stages of the German Spring Offensive in Flanders [8].
Charlie's return came in the middle of a very different kind of battle for his unit. Earlier that month the German army had launched a major offensive in Flanders, driving west towards Hazebrouck, one of the most important railway junctions behind the British front. The railways running through the town formed part of the network linking the armies in Flanders with the Channel ports, through which Britain sent troops, ammunition, food and other supplies into France. If Hazebrouck fell, the Germans could disrupt that flow, make it much harder for the Allies to reinforce and supply their troops around Ypres, as well as bringing the Channel ports themselves increasingly under threat. Holding the town was therefore about much more than defending one place: it was about keeping the northern British army connected to the supply system that allowed it to keep fighting [48].
The 1st Australian Division, including Charlie's new unit of the 1st Australian Machine Gun Battalion, had been hurried north to help block the advance and was now holding a defensive line in the countryside around Strazeele, Fletre and Rouge Croix, directly in the path of any renewed German push [49].
The 1st Machine Gun Battalion specifically was holding positions around Rouge Croix. The sector was anything but quiet. The day before Charlie's arrival, more than 3,000 gas shells had fallen on nearby Fletre, causing over thirty casualties, and both Allied and German artillery remained extremely active. The company was already preparing for the possibility of another German breakthrough: mobile machine-gun sections were kept ready to move at short notice, their guns and ammunition carried on horse-drawn fighting limbers so that they could be sent wherever the line was threatened [49].
On the night of 28 April, the men could hear an immense bombardment developing towards Kemmel. At times the artillery fire became an intense drumfire and continued through the night into the early morning. The following day the Germans launched another major attack across the front from Mont Noir towards Zillebeke, including the fighting around Scherpenberg. From its position further west, the 1st received reports that, apart from one area, the Germans were driven back with heavy losses [49].
Even after the attack had been repulsed, the threat was taken seriously. On 30 April senior officers from Charlie’s battalion reconnoitred villages behind the front — including Strazeele, Pradelles, Rouge Croix, Fletre and Borre — looking for houses that could be strengthened and converted into machine-gun strongpoints in case the Germans broke through the main defensive line. The immediate crisis was beginning to ease, but the battalion was still preparing for the possibility that the enemy advance might resume [49].
Through May and June, and into July, the immediate danger of a German breakthrough gradually receded. Charlie’s battalion remained in the Flanders sector, reconnoitring defensive positions, maintaining the line and preparing in case the offensive resumed. As the summer progressed, however, the Australians began taking the initiative themselves, using patrols, raids and limited attacks to push the German positions back piece by piece [50].
One of the key positions in front of them was Merris, a village only a few miles from Hazebrouck which had become part of the German front line. Australian troops had already been pressing closer to the village during June and July, and at the end of the month the 10th Australian Battalion was ordered to capture it. Rather than attack straight through the village, the plan was to move around it from both sides, encircle the German defenders and establish a new line beyond it. Machine guns and artillery would provide a protective curtain of fire along the flanks of the advancing infantry [50] [51].
The attack began shortly after midnight on 30 July 1918. Charlie’s company formed the left-hand part of the machine-gun barrage. Its guns opened fire before dawn. Thick mist made it difficult to see how the attack was progressing, so the barrage was repeated in bursts: ten minutes of rapid fire every half-hour until 9.30am. When the 10th Australian Battalion called for the original barrage to be put down again, they opened up their guns once more. By the end of the operation Charlie’s company had fired around 110,000 rounds, in addition to its normal programme of harassing fire [50].
Those 110,000 rounds did not arrive at the guns all at once. As the barrage continued through the night and morning, Charlie and the other drivers had to keep ammunition moving from the transport lines, where the company’s horses, limbers and supplies were based, towards the gun positions, replenishing what the Vickers guns were consuming. That meant repeated journeys bringing fresh ammunition closer to the batteries as the firing continued.
The attack was a striking success. The Australian infantry encircled Merris within a remarkably short time, captured the village and straightened the front line, taking large numbers of German prisoners for comparatively light Australian losses. The expected German counterattack never properly developed — although supporting artillery and machine guns were kept ready to meet it — as the German forces in the area were too badly disrupted to mount a serious attempt to retake the village [50].
The fighting around Merris was one of Charlie’s last major actions at the front. In the days that followed, the company settled back into the familiar routine of defensive duties and preparation. Then, on 4 August 1918, Charlie made an unusual choice of his own: after serving as a Lance Corporal since the previous October, he voluntarily gave up the appointment and returned to the rank of Private. His service record does not explain why [8].
Three days later, on 7 August, he began a period of leave in Britain. He returned to the battalion on 25 August, but only four days later was admitted to hospital suffering from urethritis associated with gonorrhoea. He would never return to front-line service [8].
Charlie remained within the military hospital system for the rest of the war. While he was receiving treatment, the Allies began the great offensive that would bring the fighting on the Western Front to an end. Beginning with the Battle of Amiens in August, they pushed the German army steadily eastwards, through the Somme fighting and back towards the Hindenburg Line. The line was finally broken at the end of September, leaving Germany’s military position increasingly untenable and helping bring about the Armistice on 11 November 1918 [34].
After 97 days of treatment in France, Charlie briefly returned to the Machine Gun Base Depot, but was admitted sick again and evacuated to England in December 1918. He received further periods of treatment at the 1st Australian Dermatological Hospital at Bulford until March 1919 [8].
On 20 April 1919, Charlie finally embarked for Australia aboard the Boonah. He reached Melbourne on 8 June and Sydney on 11 June before returning to Queensland, where he was formally discharged from the Australian Imperial Force on 22 July 1919. [8].
Charlie returned home to Farleigh. Sadly, he was not home long before his mother, Lena, died during the influenza pandemic, her death attributed to pneumonia and heart failure [35].

21st Machine Gun Company at Hazebrouck, 16 April 1918
Interwar period
Following Lena's death, her husband George returned to his family in the UK [36].
Charlie worked as a labourer, which would have included cane cutting and seasonal work in the sugar mills, who were a major employer in the area.
In 1925, Charlie was working as a labourer in Macknade, a town near Ingham based around the Macknade sugar mill [12]. He also briefly went into business with his half-brothers, Vivian ("Viv"), Thomas and Bertie Beasley (trading as "Beasley Bros."), selling firewood [11]. They sold from a wood depot they operated, which Charlie invested some money into. However, Charlie allegedly had a row with his step-father, Charles Thomas Beasley in relation to it, which Beasley denied, and it seems Charlie only involved himself in the business for no more than a year [37, 37a].

Canecutters at Innisfail, 1923
Charlie became engaged to Frances Dingley of north Mackay, the daughter of Ethel Dingley, but the relationship did not work out [25].
On 23rd February 1927, aged 32 years, Charlie married Mildred Edmonds ("Milly") at the Church of the Holy Trinity in Bowen [13]. The pair had met in Mackay [38] and Milly (as she was known) was two months pregnant with their first child at the time. She was 20 years old and a native of Bowen, the daughter of William Spencer Edmonds ("Wingy") and Chrisop Morris ("Chrissy Gundy"). The family moved to Mia Mia, a small township almost 45 km (30 mi) west of Mackay [14]. It's likely Charlie was there for work - the area was a large sugar cane growing area that needed labourers for cutting and crushing.

Holy Trinity Church, Bowen c1874
Charlie and Milly had four children - two sons and two daughters. They lived in and around Mackay. Their eldest son, William George (known as George) remembered their home on Holland Street, Mackay, which was one of two houses provided as accommodation for cane cutters, which was the work Charlie did when in season. It was only a small place and the family stayed there briefly, while Charlie worked cutting cane. They then moved to Town Beach on Mackay beach. It was an older home but comfortable. It had only one bedroom - as George remembered it, it had one bed at one end of the room, and George slept at the other end of the room [38].
Outside of cane cutting season, Charlie would find other work such as working on the railway line or cutting wood. He also worked as a fugal man/fugler at Farleigh Mill. These men worked at the centrifugal machine, which was part of the sugar refining process [38] [25].
Charlie was an adaptable, industrious man who would learn quickly and could turn his hand to anything. George remembered a bath tub that Charlie made for the family, using salvaged galvanised iron sheets. Charlie collected the sheets and soldered them together to make the tub. It wasn't only heavy construction he could put his hand to. He developed his own photos and also did "fancy work", including embroidery [38]. His daughter-in-law remembered a beautiful embroidered blanket that he made and he submitted two cushion covers which he had made and decorated with raised woollen work, into the needlework section at the Mackay Show. Though they didn't win a prize, they did win high praise from the judges [25] [39].
Charlie kept a small veggie patch in the family's backyard, growing things such as lettuces. The veggie patch and a small flock of chickens were looked after by George while Charlie was away working – he had an old Harley Davidson with a side car that he would use to get around in and he would typically leave home to work for the week, then come home on the weekend. On weekends, Charlie would change the paper out of the bottom of their hanging meat safe and add water to the bottom, to keep the meat cool. He would also chop all the wood the family would need for the following week. It would be George's chore to put the wood under the harbour tank to keep it dry [38].
Charlie loved to watch a storm roll in and he was always involved in the local militia. Proud of his military service, he would attend the ANZAC Day parades each year, taking his eldest son with him to the Mackay ANZAC Day Parade in 1935 (along with his brother-in-law Robert Salsbury, husband of his half-sister, Penelope Beasley) [38].

ANZAC Day Parade in Mackay, c1920-1930
There were cracks in Charlie's marriage to Milly - Charlie was a fastidious man, whereas Milly was untidy. Things like changing the paper in the hanging meat safe was something Charlie would do every weekend and he would be frustrated that the same paper was still there the following weekend, unchanged. A deeper crack was Charlie's doubt that Milly was faithful to him. After the birth of their youngest daughter, Charlie came to the belief that she was not his natural daughter. The couple had a blazing row at Town Beach over this, which ended in Charlie raising his hand to Milly and slapping her hard enough to hit the ground, before taking off in fury. Milly packed herself and the children up immediately, got on a train and headed to Collinsville, where her parents were then living [38] [25].
Their marriage never recovered. The following year, 1939, war was declared again on Germany and Australia joined the Allied war effort. Charlie enlisted at Rockhampton on 9th June 1940, aged 45. Because of his age, he lied about his year of birth, giving it as 1905 rather than 1895 [22].
Before he left Mackay for war, he sent a letter to Rose Beasley, the wife of his half-brother John ("Jack"). Charlie had known Rose growing up and he invited her to visit him for a cup of tea and a chat. Rose brought her 6-year-old daughter Veronica with her to meet "uncle Charlie". During the visit, Charlie told Rose that he was leaving Mackay very soon as he had re-joined the army. Veronica remembered Charlie looking very sad and telling her mother that he didn’t know if he was coming back from this one (the war) but it didn’t matter. After an emotional goodbye, Charlie left for the war two days later [25].
World War 2 service and death
Charlie was transferred to the Eastern Command based in Sydney in preparation for deployment to the Middle East. On the 27th December 1940, just two days before his 46th birthday, Charlie departed for war on HMT K10 (Natal San) from Sydney harbour [22].
The troopship arrived in Egypt a little over a month later on 1st February 1941. Upon arrival, he spent time in Alexandria, visiting the British War Cemetery there, where he had a photos of himself outside the cemetery and holding a "Palestine black snake".

Charlie Fletcher holding a Palestine black snack at the British War Cemetery, Alexandria, 1941
After arriving in the Middle East on 1 February 1941, Charlie was sent to the 18th Australian Training Battalion at Beit Jirja in Palestine. The following day he was detached to the Middle East Weapons Training School (MEWTS), where he spent the next month serving as batman to Lieutenant Thomas Goodman Adrian Harvie [22] [23, 23a].
A batman was a soldier assigned to assist an officer with the practical business of army life — looking after his kit and equipment, carrying messages and helping with the everyday tasks that allowed the officer to concentrate on his duties. Charlie and Harvie evidently got along well. Harvie took a photograph of a grinning Charlie and later wrote on the back: “the best batman ever” [23, 23a].
On 5 March Charlie returned to the 18th Training Battalion. Five days later he moved to a staging camp, and on 11 March 1941 he finally joined the 2/12th Infantry Battalion in Egypt, ready for operational service [22].

Beit Jirja Australia training camp, Palestine, Oct 1940 [colourised]

Last known photo taken of Charlie by Capt. Harvie, Feb/Mar 1941
In early April 1941, the 2/12th Battalion moved to Tobruk in Libya as part of the 18th Australian Brigade, reinforcing the garrison as the British and Commonwealth forces withdrew across North Africa ahead of the German and Italian advance. Tobruk was strategically vital. Its sheltered deep-water harbour was the only one of its kind in eastern Libya and offered a way of bringing men, ammunition, fuel and other supplies much closer to the fighting than would otherwise have been possible. If the Axis captured it, they could use the port to support their own advance towards Egypt and the Suez Canal. While it remained in Allied hands, their supplies had to travel much farther overland across the desert [22] [40] [52].
By 11 April the German and Italian armies had surrounded Tobruk, beginning a siege that would last for months. The garrison — predominantly Australian at this stage — held a network of defensive positions around the town while supplies and reinforcements reached them by sea. Charlie had joined the 2/12th only a few weeks earlier and was now serving inside the besieged fortress [52] [53].
At the end of April the Axis launched a major attack against Tobruk’s outer defences. Although the Australians stopped the wider breakthrough, the Germans and Italians captured a wedge of ground about 5.5 kilometres wide and 4 kilometres deep inside the perimeter. This became known as the Salient — essentially a bulge driven into the Allied defensive line. On 3 May the 2/12th and 2/9th Battalions were ordered to counterattack in an attempt to cut off this foothold and restore the perimeter [40] [52].
The operation was organised at very short notice. During the late afternoon of 3 May, the 2/12th’s commanding officer and other senior officers went forward to examine the ground, but came under mortar and shell fire and were forced to move. At about 7pm the troops themselves began assembling in a wadi behind the start line. Enemy 75mm guns shelled the area as they gathered, although initially only a few men were wounded [40].
Zero Hour was set for 8.45pm. At that moment the Allied artillery opened a planned barrage against the German positions, intended to suppress the defenders as the battalion moved forward. In almost complete darkness the battalion moved off, with the Battalion's A Company leading on the right and C Company on the left, while B and D Companies followed in support. The ground offered few landmarks, and once the attack began the situation quickly became confused. The battalion diary described the country as “absolutely featureless”. Men lost direction or became separated from their leaders while machine-gun fire, mortars and artillery fell around them [40].
Enemy flares repeatedly lit the darkness, while coloured light signals added to the confusion. The artillery preparation had not silenced all of the Axis positions, and machine guns and mortars outside the immediate area of the barrage were able to fire into the advancing Australians. With little reliable information reaching Battalion Headquarters, it became increasingly difficult to tell where individual companies and platoons had reached [40].
By about 3am on 4 May, the battalion had, in the words of its own diary, been “severely handled”. The enemy had been fully prepared, while the Australians had received so little warning that some platoon and section commanders had not even been able to inspect the ground beforehand. Higher command ordered the attack abandoned, and the battalion withdrew to its original area, completing the movement by around 6am [40].
Somewhere in that confused night fighting, Charlie was hit. His service record records a gunshot wound to the buttock during the action of 3–4 May. The apparently simple description understates the seriousness of the injury: when he was admitted to hospital he was also suffering from retention of urine, indicating significant complications from the wound [22].
On 4 May Charlie was admitted to the 2/4th Australian General Hospital at Tobruk, where the major surgical cases from the fortress were being treated. The hospital itself operated under wartime conditions inside the besieged town and had already suffered enemy bombing. On 17 May Charlie was evacuated from Tobruk to the 64th British General Hospital in Alexandria, Egypt, where his treatment continued [22].
News travelled home much more slowly. On 19 May the Daily Mercury, Mackay's local paper, reported that Charlie had been wounded in action and, in June reported that he was seriously ill. The Army formally notified Mrs Zena Harney, whom Charlie had named as his friend and next of kin, of his wounding on 22 May [40] [41] [22].
Charlie survived for more than three months after he was wounded, but never recovered sufficiently to return to duty. On 7 August 1941, while still in hospital in Alexandria, he died of his wounds. He was 45 years old [22].
His service record initially recorded his burial as being at the British War Cemetery at Chatby, but this was subsequently corrected to Alexandria (Hadra) War Memorial Cemetery, Plot 2, Row C, Grave 3, where Charlie remains buried today [22].
Back in Queensland, Mrs Harney was formally notified of Charlie’s death on 12 August and the Daily Mercury published his obituary. Charlie’s Beasley brothers and sisters later placed a notice thanking the Mackay community for the messages of sympathy they had received [43] [44] [24].
The following year, Charlie was still very much in Zena Harney’s thoughts. She placed an In Memoriam notice in the newspaper from herself and her family, remembering the man who had gone away to war for a second time and never come home [45].

Alexandria (Hadra) War Memorial Cemetery
Source information
-
Charles Joseph Legg, Queensland Birth Certificate, 29 Dec 1894, Record no: 11050/242, QLD Registry of Births, Deaths and Marriages [www.familyhistory.bdm.qld.gov.au]
-
George Albert Fletcher, Australia Electoral Rolls 1903-1980, Division of Maranoa, Subdivision of Tambo, 1903, Ancestry [www.ancestry.co.uk]. Location of father is used as a proxy for location of Charlie, as he was a minor at the time.
-
George Albert Fletcher, Australia Electoral Rolls 1903-1980, Division of Maranoa, Subdivision of Tambo, 1909, Ancestry [www.ancestry.co.uk]. Location of father is used as a proxy for location of Charlie, as he was a minor at the time.
-
George Albert Fletcher, Australia Electoral Rolls, Division of Mackay, 1910, FindMyPast [www.findmypast.co.uk]. Location of father is used as a proxy for location of Charlie, as he was a minor at the time.
-
Farleigh, Daily Mercury, Tue 28 Mar 1916, page 3, National Library of Australia [trove.nla.gov.au]. This refers to a send-off to war that Charlie received in 1916 and mentioned he had been in Farleigh for 6 years, putting approximate arrival as 1910.
-
George Albert Fletcher, Australia Electoral Rolls 1903-1980, Division of Herbert, Subdivision of Mackay, 1912, Ancestry [www.ancestry.co.uk]. Location of father is used as a proxy for location of Charlie, as he was a minor at the time.
-
George Albert Fletcher, Australia Electoral Rolls 1903-1980, Division of Herbert, Subdivision of Mackay, 1914, Ancestry [www.ancestry.co.uk]. Location of father is used as a proxy for location of Charlie, as he was a minor at the time.
-
Pte. Charles Joseph Fletcher, AIF Military Service Record, 1916, Service no: 375, Series no: B2455, National Archives of Australia [naa.gov.au]
-
Charles Joseph Fletcher, Australia Electoral Rolls 1903-1980, Division of Herbert, Subdivision of Mackay, 1921, Ancestry [www.ancestry.co.uk]
-
Charles Joseph Fletcher, Australia Electoral Rolls 1903-1980, Division of Herbert, Subdivision of Mackay, 1922, FindMyPast [www.findmypast.co.uk]. Original record not available - only a transcription.
-
[Advertisement] Firewood, Bowen Independent, 2 Jun 1923, page 5, National Library of Australia [trove.nla.gov.au]. The same advertisement also ran on 1 May 1923 and 7 July 1923 in the Bowen Independent.
-
Charles Joseph Fletcher, Australia Electoral Rolls 1903-1980, Division of Herbert, Subdivision of Ingham, 1925, Ancestry [www.ancestry.co.uk]
-
Charles Joseph Fletcher and Mildred Edmonds, Queensland Marriage Certificate, 23 Feb 1927, Record no: 1927/36, QLD Registry of Births, Deaths and Marriages [www.familyhistory.bdm.qld.gov.au]
-
William George Fletcher, Queensland Birth Certificate, 13 Sep 1927, Record no: 11811/20909, QLD Registry of Births, Deaths and Marriages [www.familyhistory.bdm.qld.gov.au]
-
Charles Joseph Fletcher, Australia Electoral Rolls 1903-1980, Division of Herbert, Subdivision of Mackay, 1928, Ancestry [www.ancestry.co.uk]
-
Charles Joseph Fletcher, Australia Electoral Rolls 1903-1980, Division of Herbert, Subdivision of Mackay, 1930, Ancestry [www.ancestry.co.uk]
-
Charles Joseph Fletcher, Australia Electoral Rolls 1903-1980, Division of Herbert, Subdivision of Mackay, 1932, Ancestry [www.ancestry.co.uk]
-
Charles Joseph Fletcher, Australia Electoral Rolls 1903-1980, Division of Herbert, Subdivision of Mackay, 1934, Ancestry [www.ancestry.co.uk]
-
Charles Joseph Fletcher, Australia Electoral Rolls 1903-1980, Division of Herbert, Subdivision of Mackay, 1936, Ancestry [www.ancestry.co.uk]
-
Charles Joseph Fletcher, Australia Electoral Rolls 1903-1980, Division of Herbert, Subdivision of Mackay, 1937, Ancestry [www.ancestry.co.uk]
-
Charles Joseph Fletcher, Australia Electoral Rolls 1903-1980, Division of Herbert, Subdivision of Mackay, 1939, FindMyPast [www.findmypast.co.uk]
-
Pte. Charles Joseph Fletcher, AIF Military Service Record, 1940, Service no: QX8249, Series no: B883, National Archives of Australia [naa.gov.au]
-
Photo of Charles Joseph Fletcher, taken by Captain Thomas Harvie in the field, National Archives of Australia [naa.gov.au]. Original photo held by Captain Harvie's son, Adrian. Adrian states that Harvie wrote on the back of the photo the words “the best batman ever”. See comment by Adrian Robyn Harvie, Capt. Harvie's son: https://www.facebook.com/212thBtnAif/photos/1227020264155842
-
Queensland Death Certificate, Charles Joseph Fletcher, 7 Aug 1941, Record no: 1941/249, QLD Registry of Births, Deaths and Marriages [www.familyhistory.bdm.qld.gov.au]
-
Conversation with Veronica Beasley, daughter-in-law of Charlie Fletcher
-
Chester Alfred Beasley and Elizabeth Legg, Queensland Marriage Certificate, 9 May 1898, Record no: 1898/C/1978, QLD Registry of Births, Deaths and Marriages [www.familyhistory.bdm.qld.gov.au]. This was a bigamous marriage for Charles Thomas Beasley, which is likely why he gave his name as “Chester Alfred Beasley”.
-
Recruitment meeting, Daily Mercury, Tue 25 Jan 1916, page 7, National Library of Australia [trove.nla.gov.au]
-
April 1917, 21st Australian Machine Gun Company Unit Diary, AWM4, Item no: 24/21/4, Australian War Memorial [www.awm.gov.au]
-
May 1917, 21st Australian Machine Gun Company Unit Diary, AWM4, Item no: 24/21/5, Australian War Memorial [www.awm.gov.au]
-
Sep 1917, 21st Australian Machine Gun Company Unit Diary, AWM4, Item no: 24/21/9, Australian War Memorial [www.awm.gov.au]
-
Oct 1917, 21st Australian Machine Gun Company Unit Diary, AWM4, Item no: 24/21/10, Australian War Memorial [www.awm.gov.au]
-
Nov 1917, 21st Australian Machine Gun Company Unit Diary, AWM4, Item no: 24/21/11, Australian War Memorial [www.awm.gov.au]
-
Dec 1917, 21st Australian Machine Gun Company Unit Diary, AWM4, Item no: 24/21/12, Australian War Memorial [www.awm.gov.au]
-
The Hindenburg Line: Breaking the Hindenburg Line, Australian War Memorial, Last updated 28 Jan 2021
-
Eleanor Fletcher, Queensland Death Certificate, 3 Jul 1919, Record no: 1919/C/4108, QLD Registry of Births, Deaths and Marriages [www.familyhistory.bdm.qld.gov.au]
-
George Albert Fletcher [1921], Census return for Cromartie Rd, Islington, Middlesex, The National Archives of the UK, Ancestry [www.ancestry.co.uk]
-
Summons Court and Summons Court (continued from other page), Bowen Independent, Sat 22 Nov 1924, pages 6 and 3, National Library of Australia [trove.nla.gov.au]
-
Conversation with William George Fletcher, son of Charlie Fletcher
-
Untitled article, Daily Mercury, Wed 3 Jul 1940, page 4, National Library of Australia [trove.nla.gov.au]
-
April-May 1941, 2/12th Infantry Battalion Unit Diary, AWM52, Item no: 8/3/12, Australian War Memorial [www.awm.gov.au]
-
Local and General: Mackay Boy Wounded, Daily Mercury, Mon 19 May 1941, page 4, National Library of Australia [trove.nla.gov.au]
-
Personal, Daily Mercury, Mon 16 Jun 1941, page 4, National Library of Australia [trove.nla.gov.au]
-
Obituary: Private C.J. Fletcher, Daily Mercury, Wed 13 Aug 1941, page 4, National Library of Australia [trove.nla.gov.au]
-
Family Notices: Thanks, Daily Mercury, Sat 6 Sep 1941, page 6, National Library of Australia [trove.nla.gov.au
-
Family Notices: In Memoriam, Daily Mercury, Fri 7 Aug 1942, page 2, National Library of Australia [trove.nla.gov.au]
-
Jan 1918, 21st Australian Machine Gun Company Unit Diary, AWM4, Item no: 24/21/13, Australian War Memorial [www.awm.gov.au]
-
Feb 1918, 21st Australian Machine Gun Company Unit Diary, AWM4, Item no: 24/21/14, Australian War Memorial [www.awm.gov.au]
-
1918 - Dernancourt and Villers-Bretonneux: Halting the Germans, Australian War Memorial, Last updated 28 Jan 2021
-
Apr 1918, 21st Australian Machine Gun Company Unit Diary, AWM4, Item no: 24/1/2, Australian War Memorial [www.awm.gov.au]
-
Jul 1918, 21st Australian Machine Gun Company Unit Diary, AWM4, Item no: 24/1/5 Part 1, Australian War Memorial [www.awm.gov.au]
-
Ross, Cameron. "The best thing the division has done", Australian War Memorial, 5 Apr 2023
-
DVA (Department of Veterans' Affairs) (2026 ), Siege of Tobruk 1941, DVA Anzac Portal, accessed 11 October 2026, https://anzacportal.dva.gov.au/wars-and-missions/ww2/where/mmea/tobruk-1941
-
2/12th Australian Infantry Battalion, Australian War Memorial,
Personal map
Map of places from Charlie's life
Family members


Adopted Parents


Half-Siblings (by mother Elizabeth)

Dorothy May Beasley
1898-1991

Penelope Gertrude Beasley
1899-1990

Lena Adeline Beasley
1902-1941

Vivian Hansen Beasley
1903-1935

Thomas Hedley Beasley
1906-1949

Bertie George Beasley
1908-1985

Mona Leah Beasley
1910-2000

1912-1992

Percy Clemard Beasley
1914-1966

Elizabeth May Legg
1897-1897
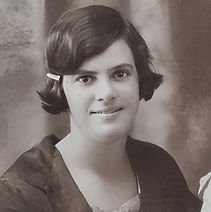
Children

William George Fletcher
1927-2024

Dorothy May Fletcher
1930-2020

Albert Charles Fletcher
1932-2024

Hazel Chrisop Fletcher
1935-2022
Photo Gallery


Personal documents
-
Letters written by Charles Joseph Fletcher to his sister, Dorothy May Beasley [transcriptions]
-
Will
-
Genealogy research report - father of Charles Joseph Fletcher
-
Family photo album - children of Charles Joseph Fletcher (special access required)
-
Family photo album - William George Fletcher and family (special access required)